How To Display The Camera Input On the Screen In Retro Gadgets
 |
| Image via: Licorice ehf |
Retro Gadgets game is no less than a paradise for those who love gadgets or who like to build or repair different gadgets because in Retro Gadgets players have to invent new gadgets and those invented gadgets have to be shared with the world so that people can make their life easy by using those gadgets.
Read also: Top 5 Open World Games Bigger Than Earth
The process of creating new gadgets and sharing them with people is a bit long and difficult because during this process players have to do many such tasks which are challenging to do such as displaying the camera input on the screen.
Displaying the camera input on the screen is a bit tough task due to which many players have to face difficulty in doing this task, if you are one of those people then this article is for you, because in this article we will give you complete information about how you will be able to display camera input on the screen in Retro Gadgets game.
Read also: Pokemon Scarlet and Violet: How To Catch Charcadet Early And Evolve Into Armarouge/Ceruledge
Retro Gadgets: How To Display The Camera Input On the Screen
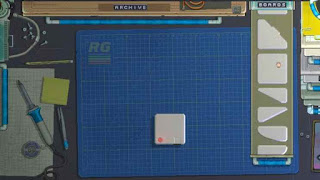
If you want to display the camera input on the screen by putting a camera component in a gadget in the Retro Gadgets game, then first you have to prepare the board of that gadget, for which you can use boards of different shapes kept in the “Boards” drawer present above.
 |
| Image via: Licorice ehf |
After putting the boards together, you have to unsolder and connect those boards, for which you have to use your soldering iron.
 |
| Image via: Licorice ehf |
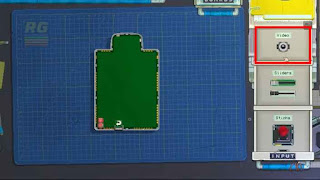
After the board of the gadget is ready, you have to open the “Input” drawer and pick up the (Video) camera present in it and place it on the board of your gadget.
Read also: Top 3 Best Screen Recorders for Android/iOS
 |
| Image via: Licorice ehf |
After installing the camera, you have to install display on the board so that you can see the scene captured by the camera in that display. To put the display on the board, you have to open the “Output” drawer and pick up your favorite display from the many different sizes of displays kept in it and place it on the board.
 |
| Image via: Licorice ehf |
Now you have to pick up the video chip and CPU kept in the “Misc” drawer and place them on the backside of your board so that you can use the video input.
 |
| Image via: Licorice ehf |
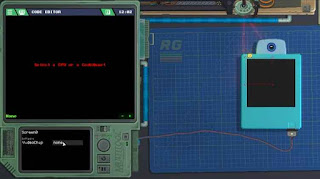
Now you have to open the drawer next to the soldering iron so that your multi-tool comes in front of you. Now with the help of your multi-tool, you have to select all your screens one by one and connect them with the video chip, after that you have to select your camera and set the video chip as the render target for the camera.
Now you have to press the power button present in your gadget, after which the camera input will be displayed on the screen i.e. the scenes captured by your camera will be displayed on your screen.
In this way, you can display the camera input on the screen in the Retro Gadgets game. Did you like this information? You can share your opinion by commenting in the comment box below.
If you want to stay updated with similar information related to the Retro Gadgets game, then you can subscribe to our website.
Read also: Tactics Ogre Reborn: How To Beat Vyce 1v1


%20Update%20Release%20Date.jpg)

